Lesson 5: Quarto

Interative Visualizations

Topics today

  • How computers work
  • Running Quarto
  • Writing in Quarto
  • Publishing to GitHub pages

How Computers Work

(for the casual user)

How files work: generalities

  • Programs store files as strings of binaries (0 & 1).
  • Programs have their own conventions & formats to read & write files into binary.
    • The “file extension” is a part of a file name for programs to quickly know the file format.
    • Your OS (Windows, macOS) helps make this association easier by double click to open with default programs.
    • But file extension is just part of a file name: you can change or omit it.

How files work: text files

  • A common format is plain text for human-readability.
    • Notepad in Windows, TextEdit in macOS, etc. read plain text files, by convention .txt.
    • Markdown (.md), HTML (.html), etc. are enhanced text files.
    • Markdown syntax draws from texting/email conventions. See Wikipedia.

How files work: notebooks

  • Extended comments in code is harder to read.
  • This led to popularity of computational notebooks:
    • Markdown for text explanations
    • Code snippets for code/simulation/data exploration.
  • iPython did this for Python and stored its files as .ipynb
  • iPython changed name to Jupyter to reflect their support of Julia, Python, and R, but kept the extension name .ipynb.
  • Google Colab implements Jupyter notebook in the cloud.

How files work: Quarto

  • The Quarto program makes publishing notebooks in presentable formats easier.
  • It uses its own enhanced Markdown and stores files as .qmd.
    • Global document metadata is stored at the top as YAML.
    • Markdown blocks are as usual.
    • Code blocks use three backticks as in .md

Running Quarto

Running Quarto

  • In RStudio:
    • Create or open .qmd file
    • Press “Render” button to see results
  • In VSCode:
    • Create or open .qmd file, say “example.qmd”
    • In terminal run quarto preview example.qmd for live-preview; ctrl+C or cmd+C kills this process.
    • In terminal run quarto render example.qmd to create output files.

Writing in Quarto

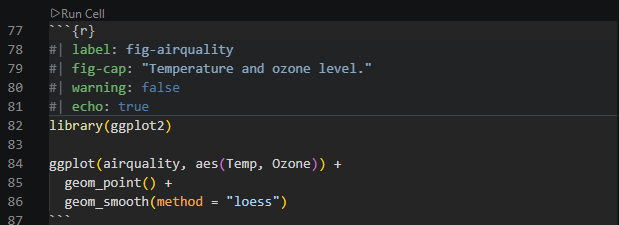
Code blocks: type this

Code blocks: get this
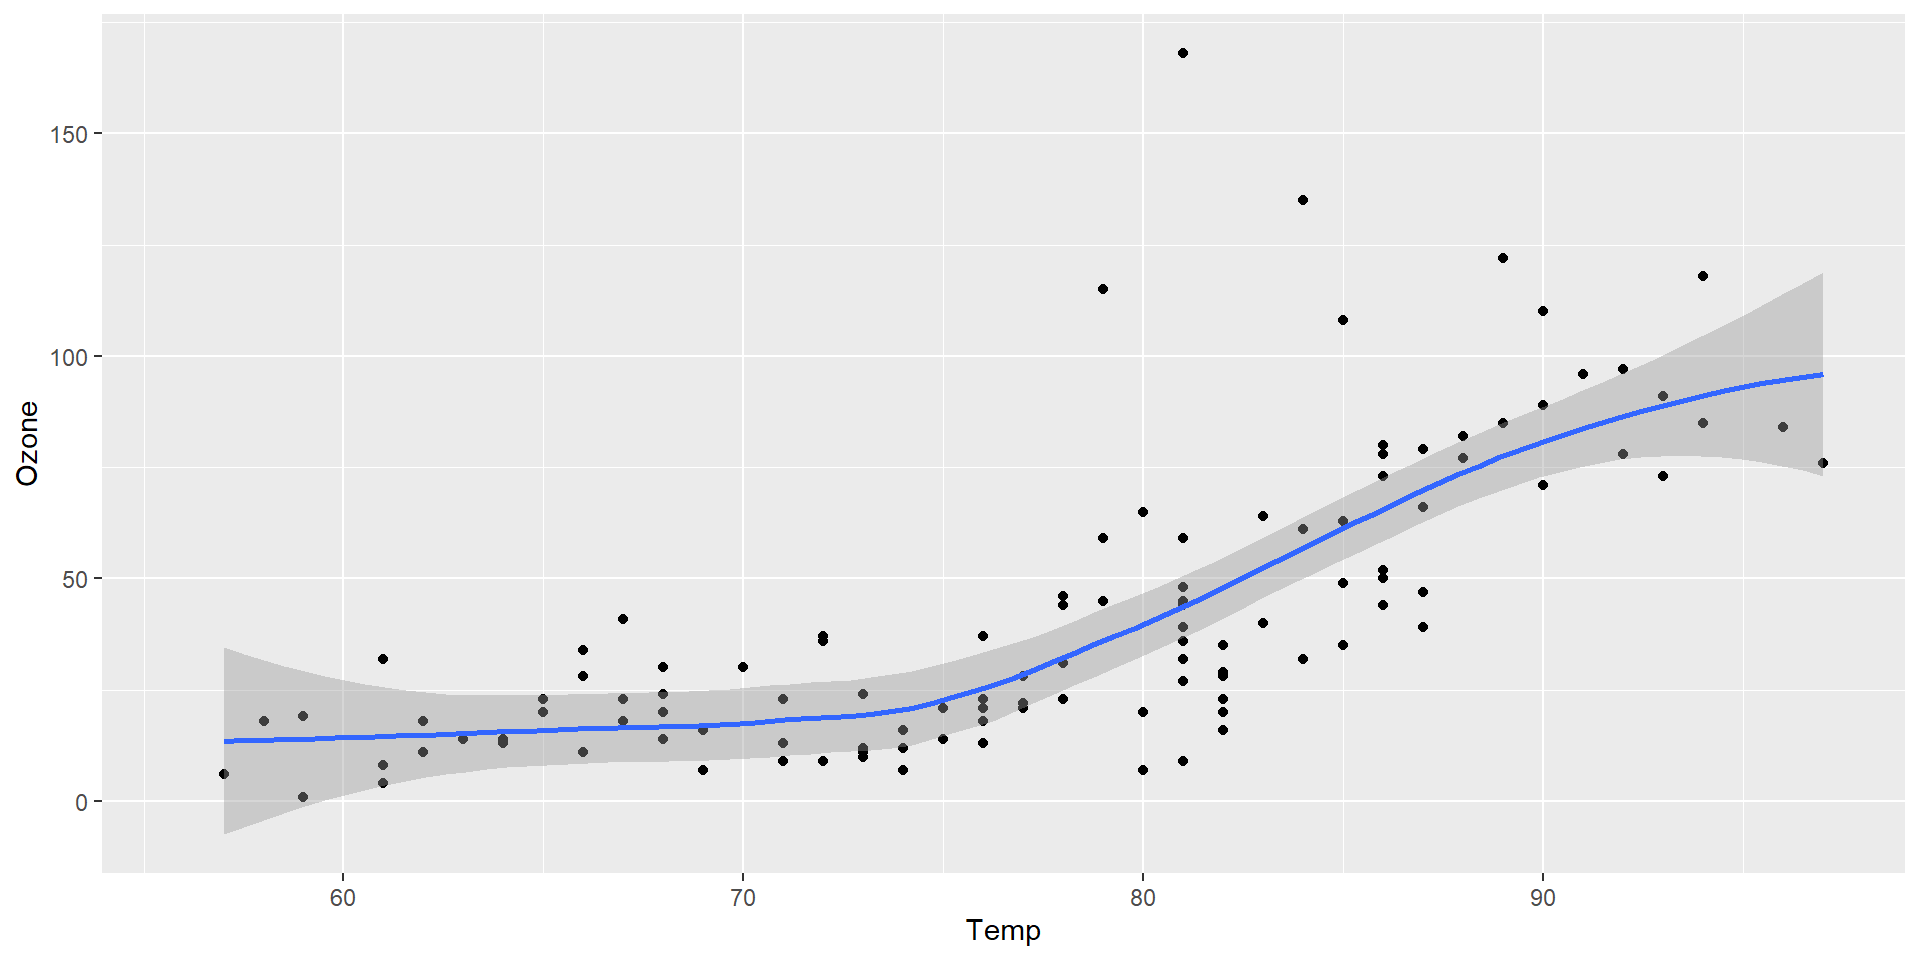
library(ggplot2)

ggplot(airquality, aes(Temp, Ozone)) + 
  geom_point() + 
  geom_smooth(method = "loess")

Figure 1: Temperature and ozone level.

Code blocks: some code chunk options

  • echo: false hides code completely
  • code-fold: true folds code instead
  • output: false to not display computation output
  • label: is figure name for cross-referencing/hyperlink
  • fig-cap: is figure caption
  • fig-alt is alternative text for screen readers to read description of image

Quarto computations reference

Metadata (YAML)

Sits at the top of your Quarto document and sets global document properties:
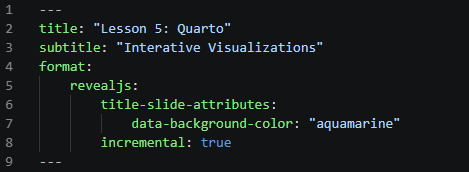
Output formats

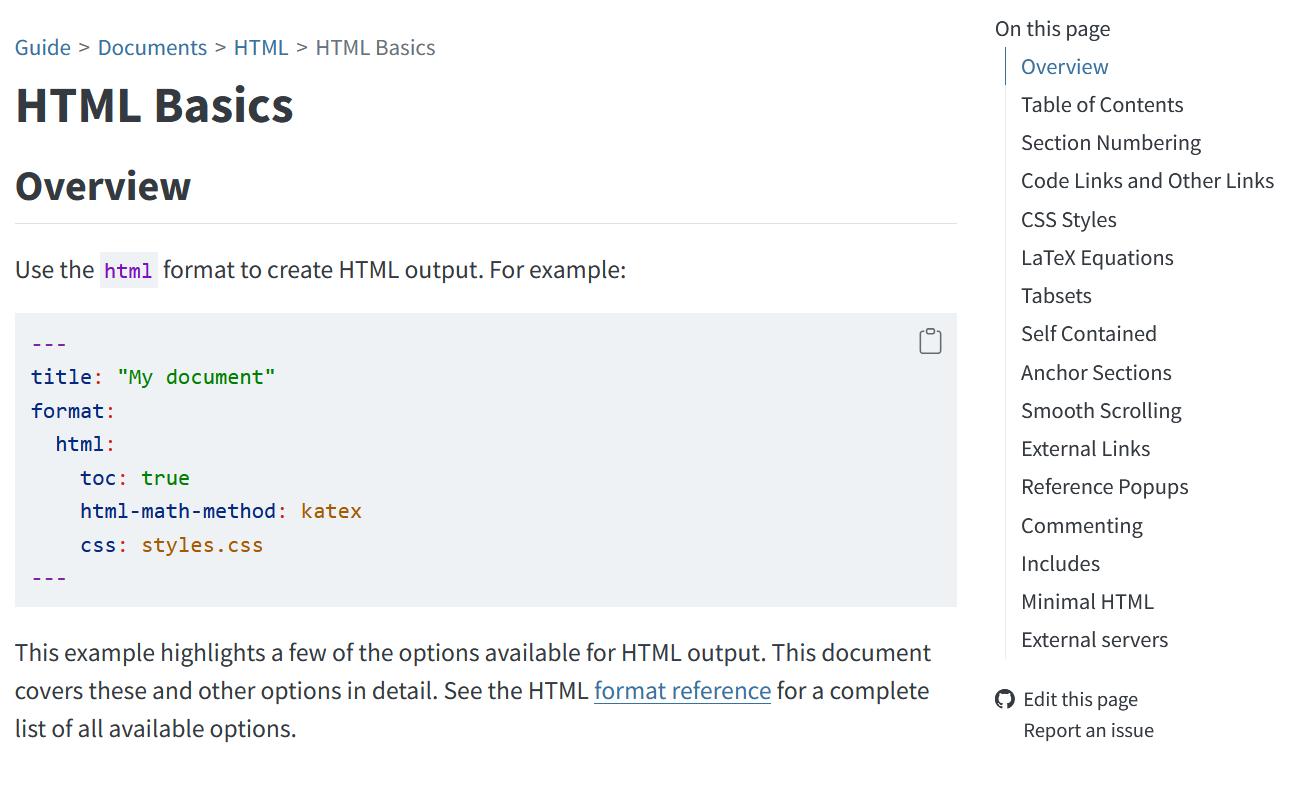
  • format: html for single webpage
  • format: dashboard for data dashboard
  • format: revealjs for slides on the web
  • format: pdf for printed documents
  • etc.
  • For website (collection of webpages), see Quarto guide.

Output formats: html

Example of a webpage

Output formats: dashboard
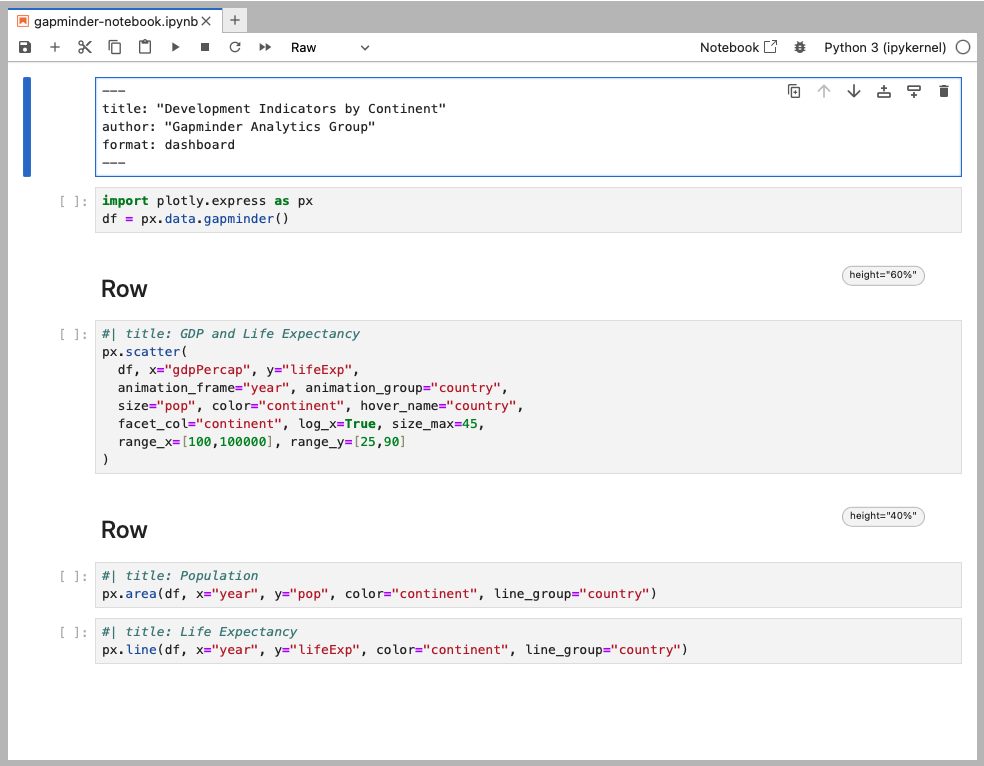
Example of dashboard code in Quarto

Output formats: dashboard
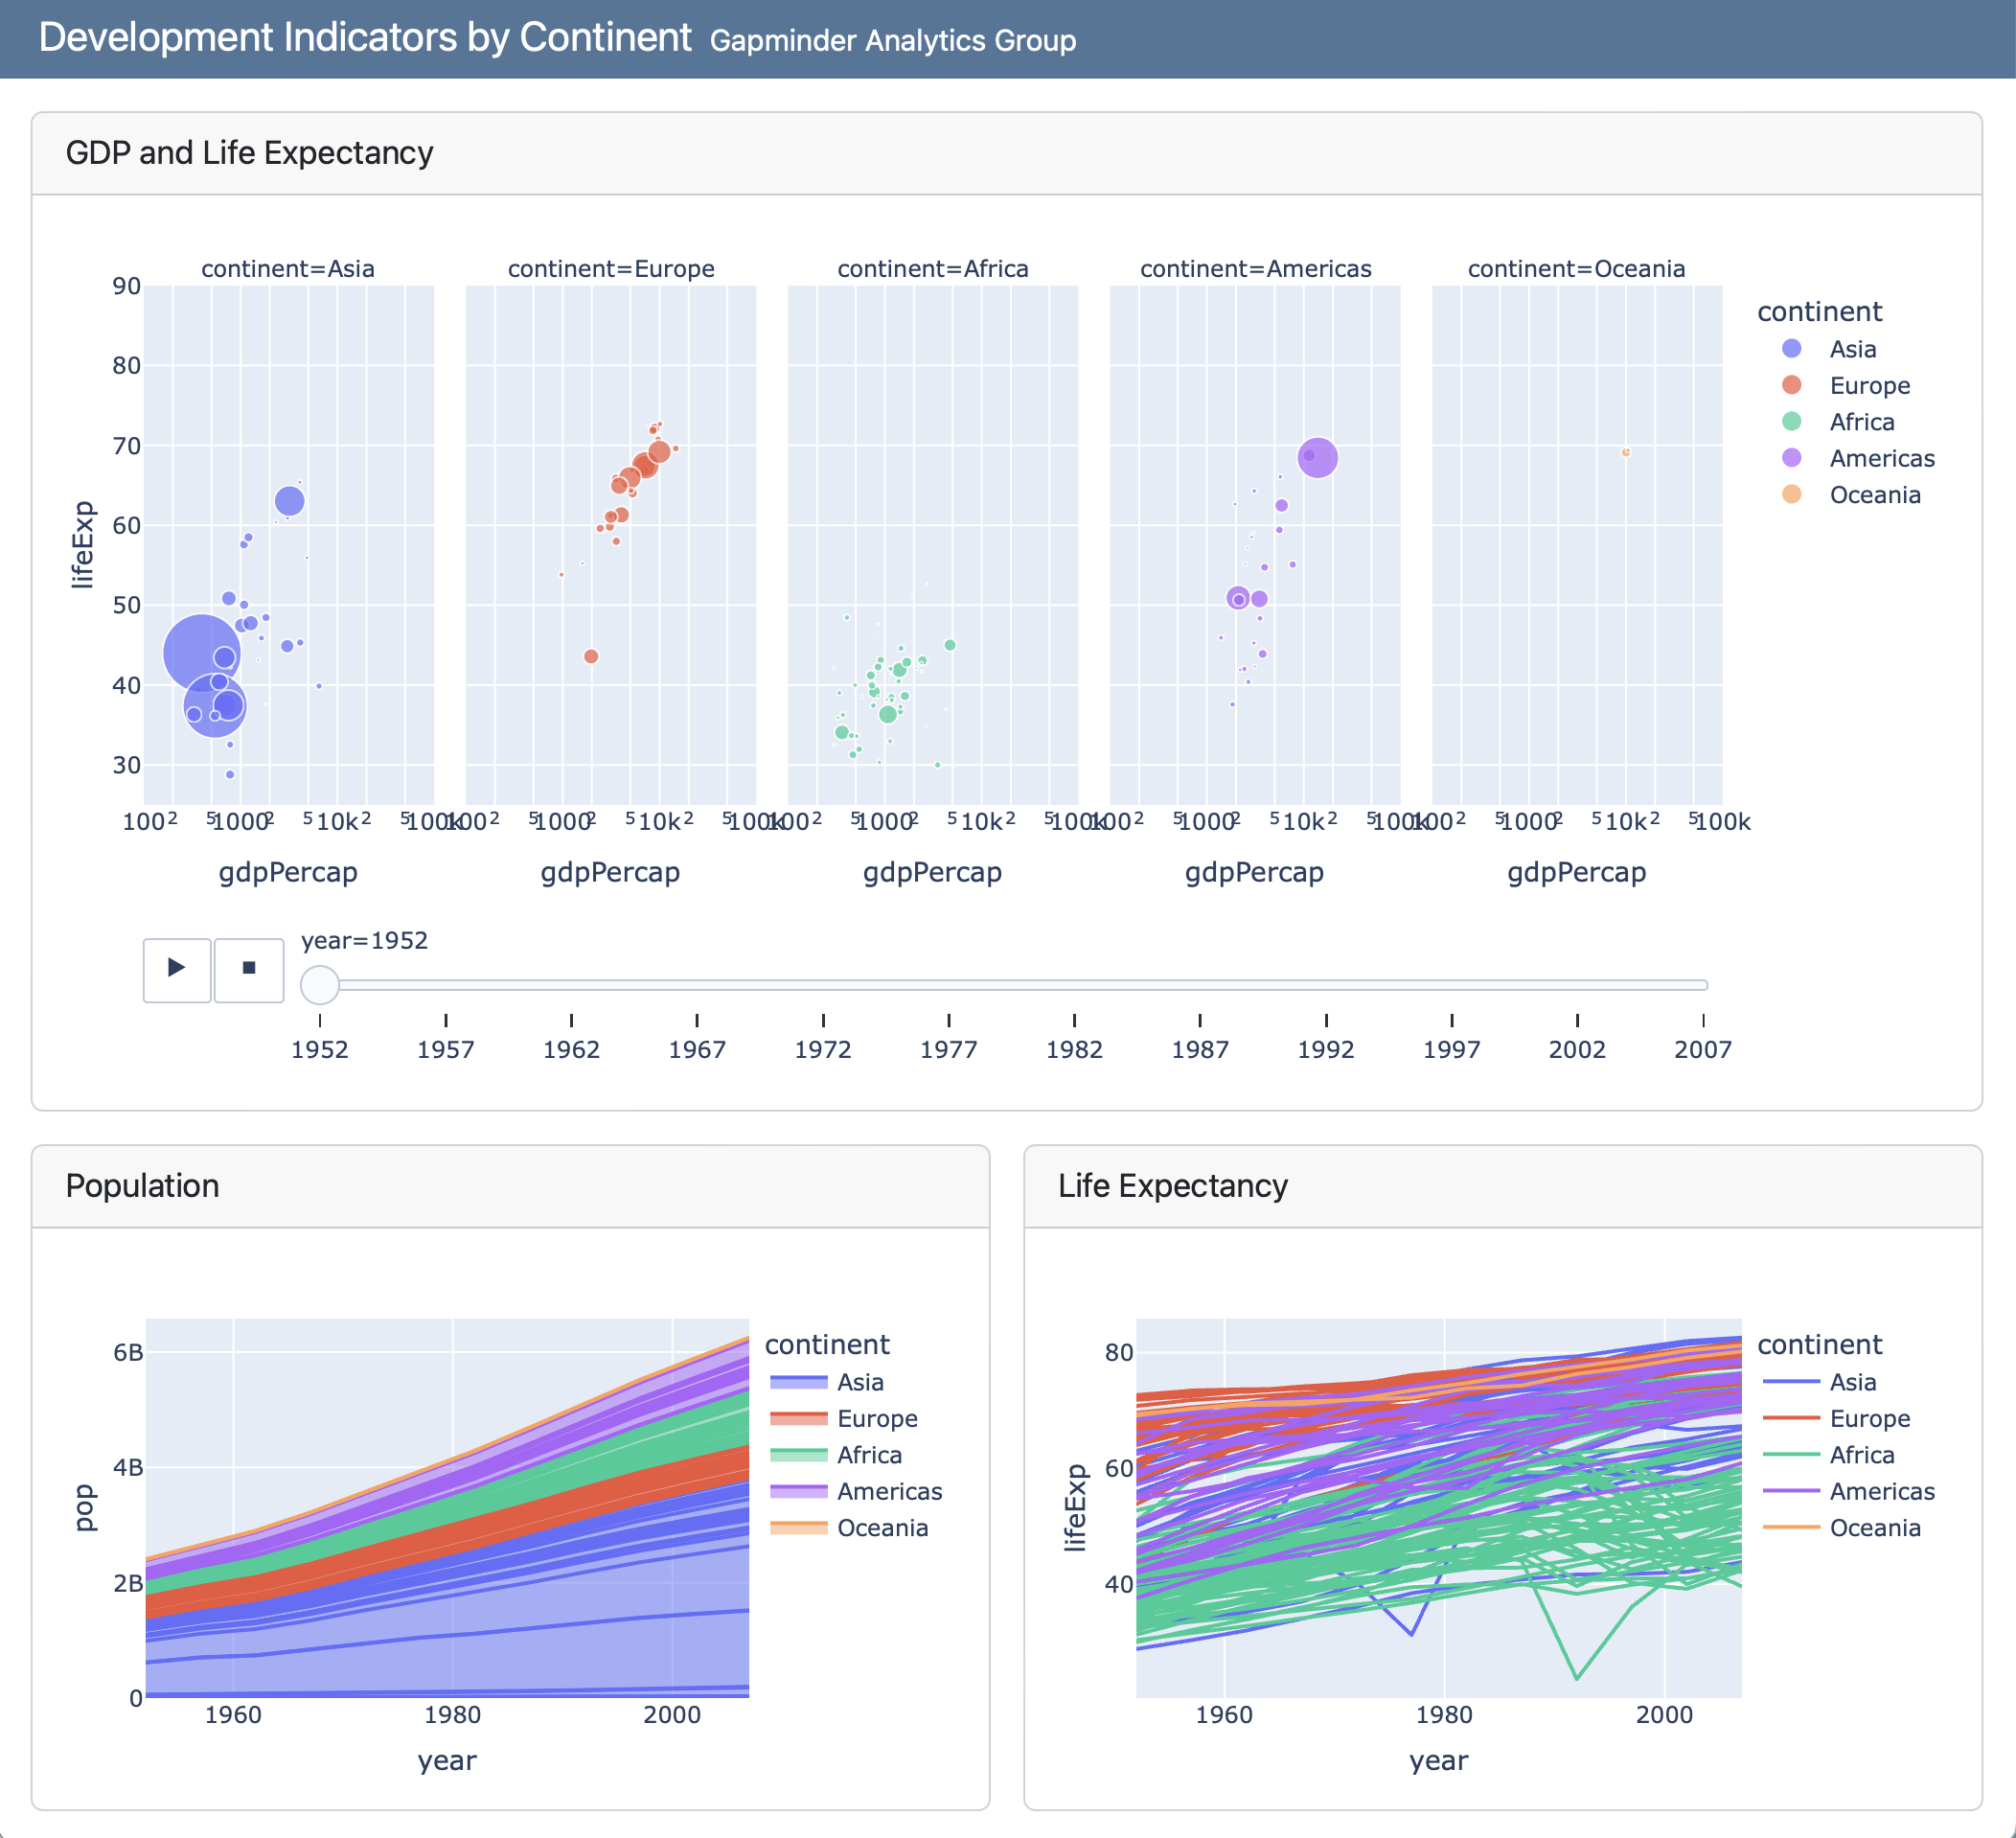
Example of resulting dashboard

Output formats: dashboard
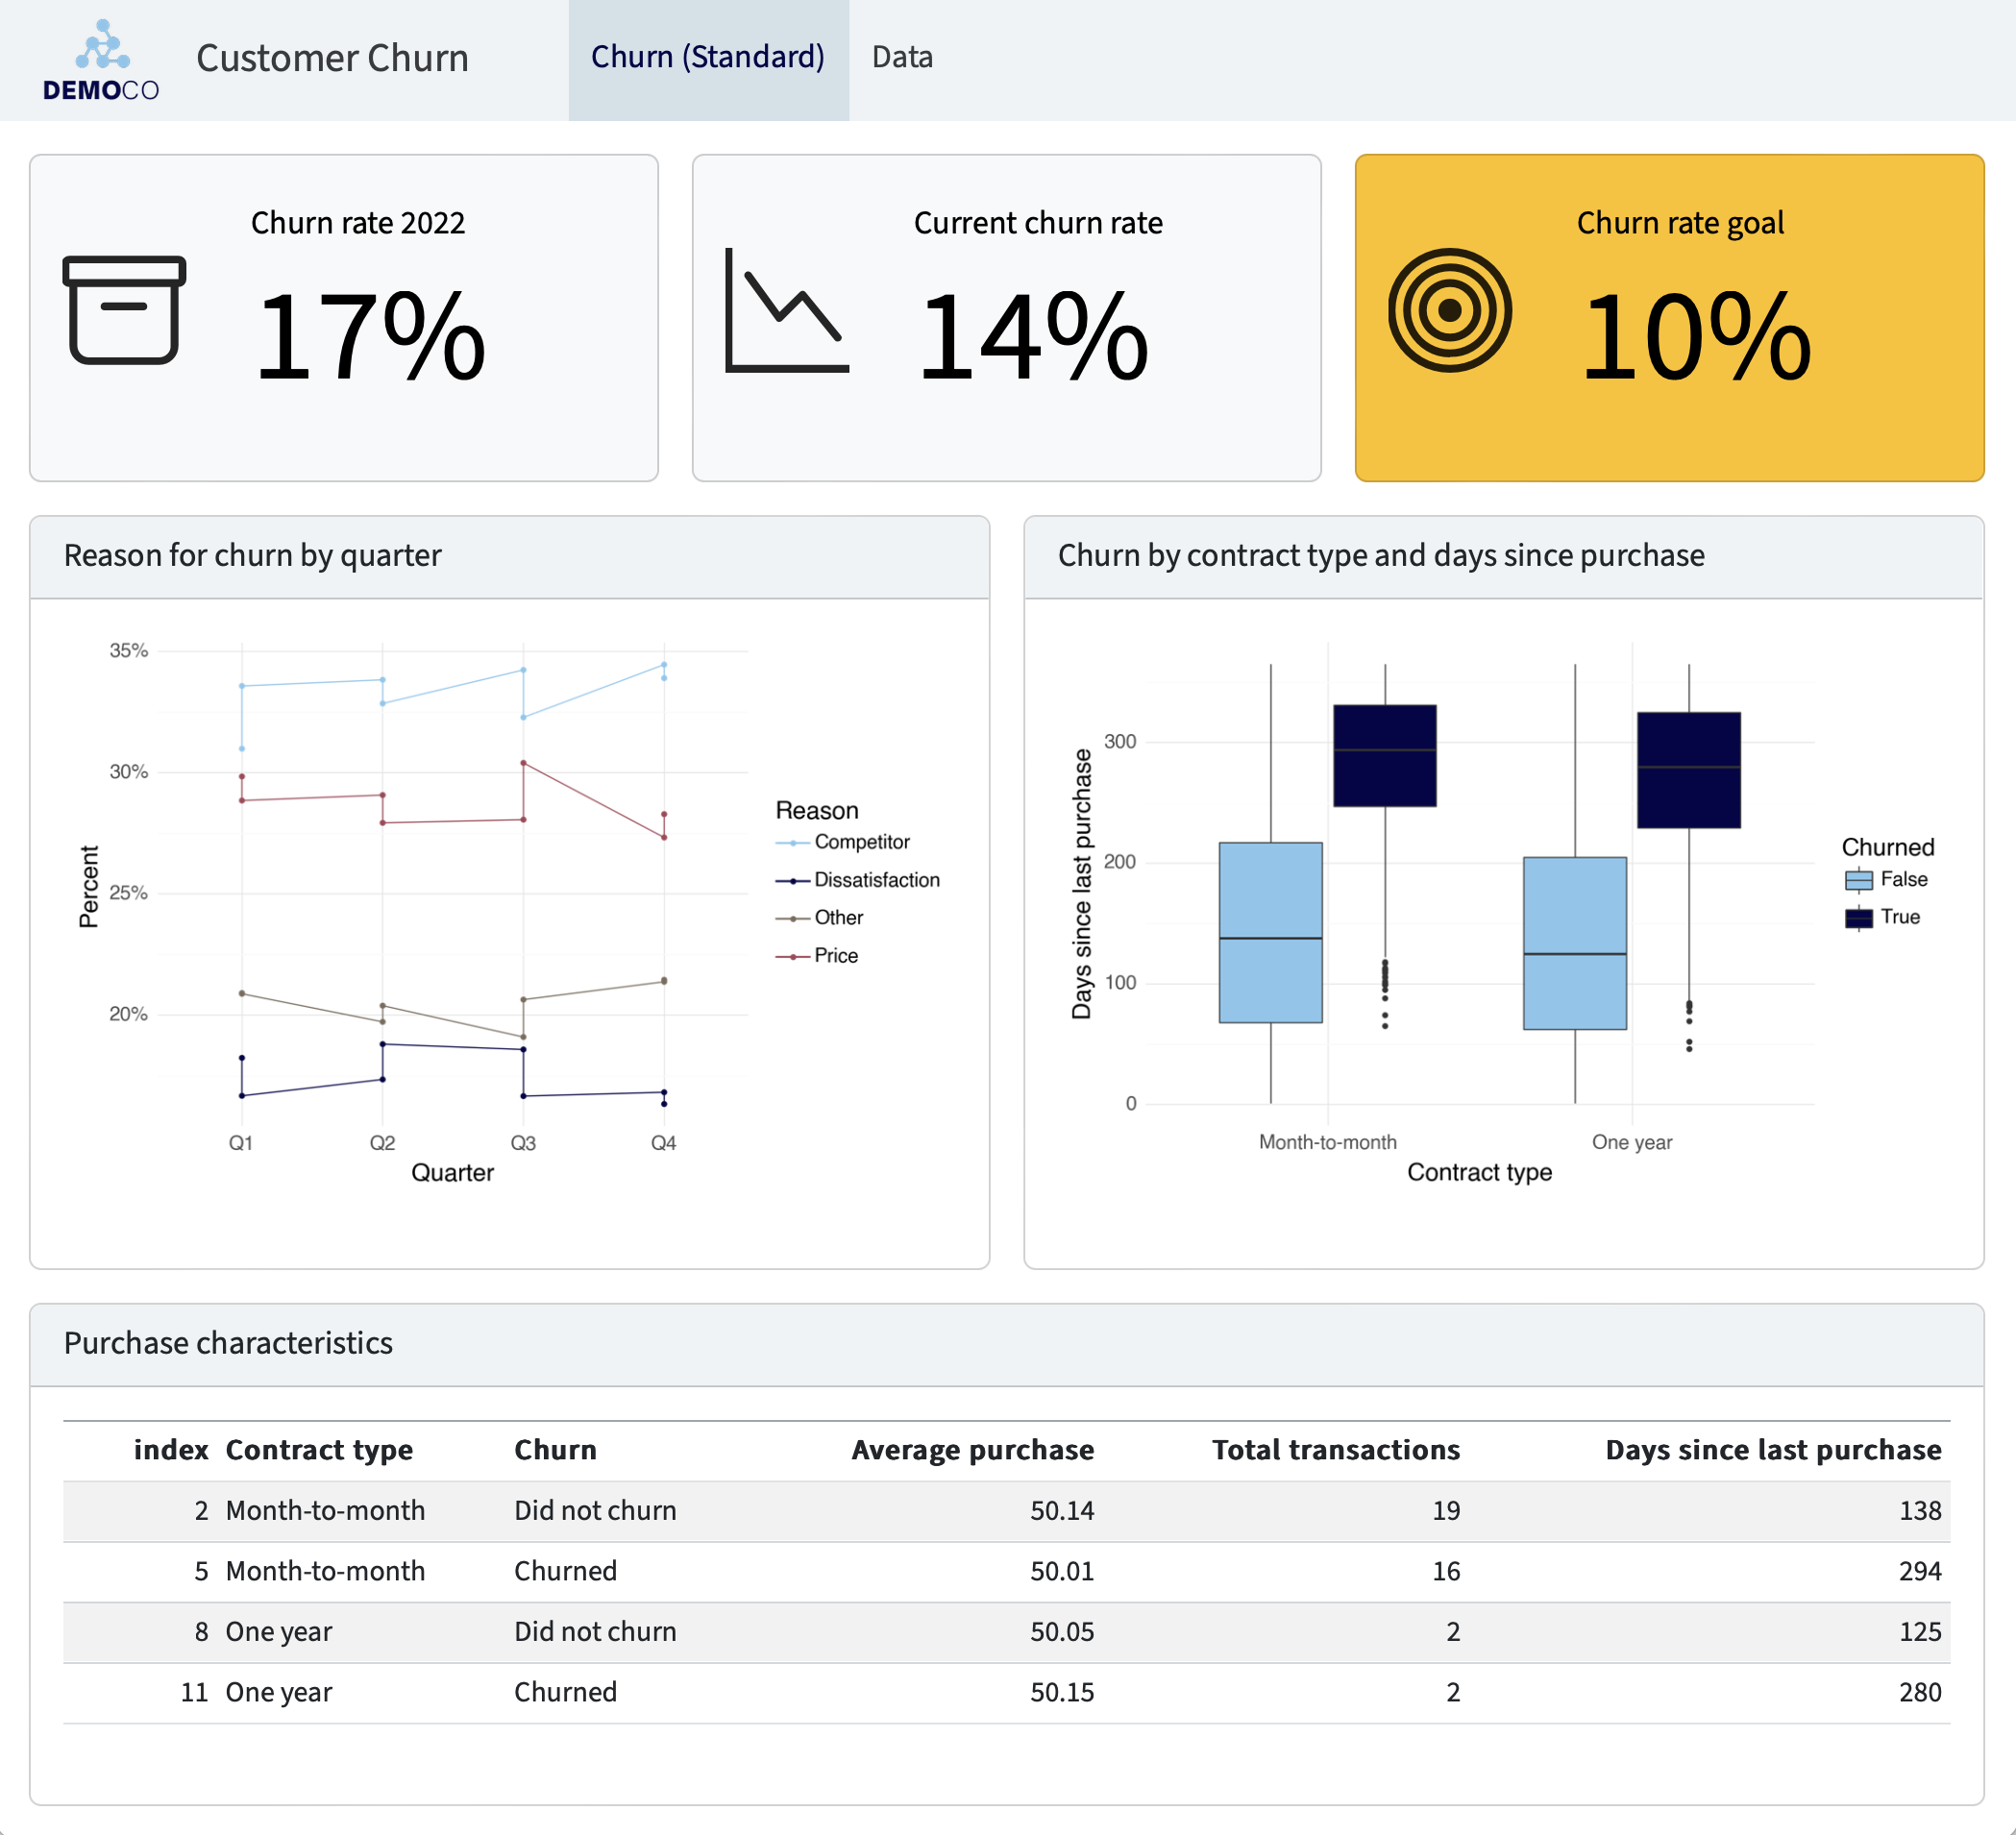
Example of customer churn data dashboard

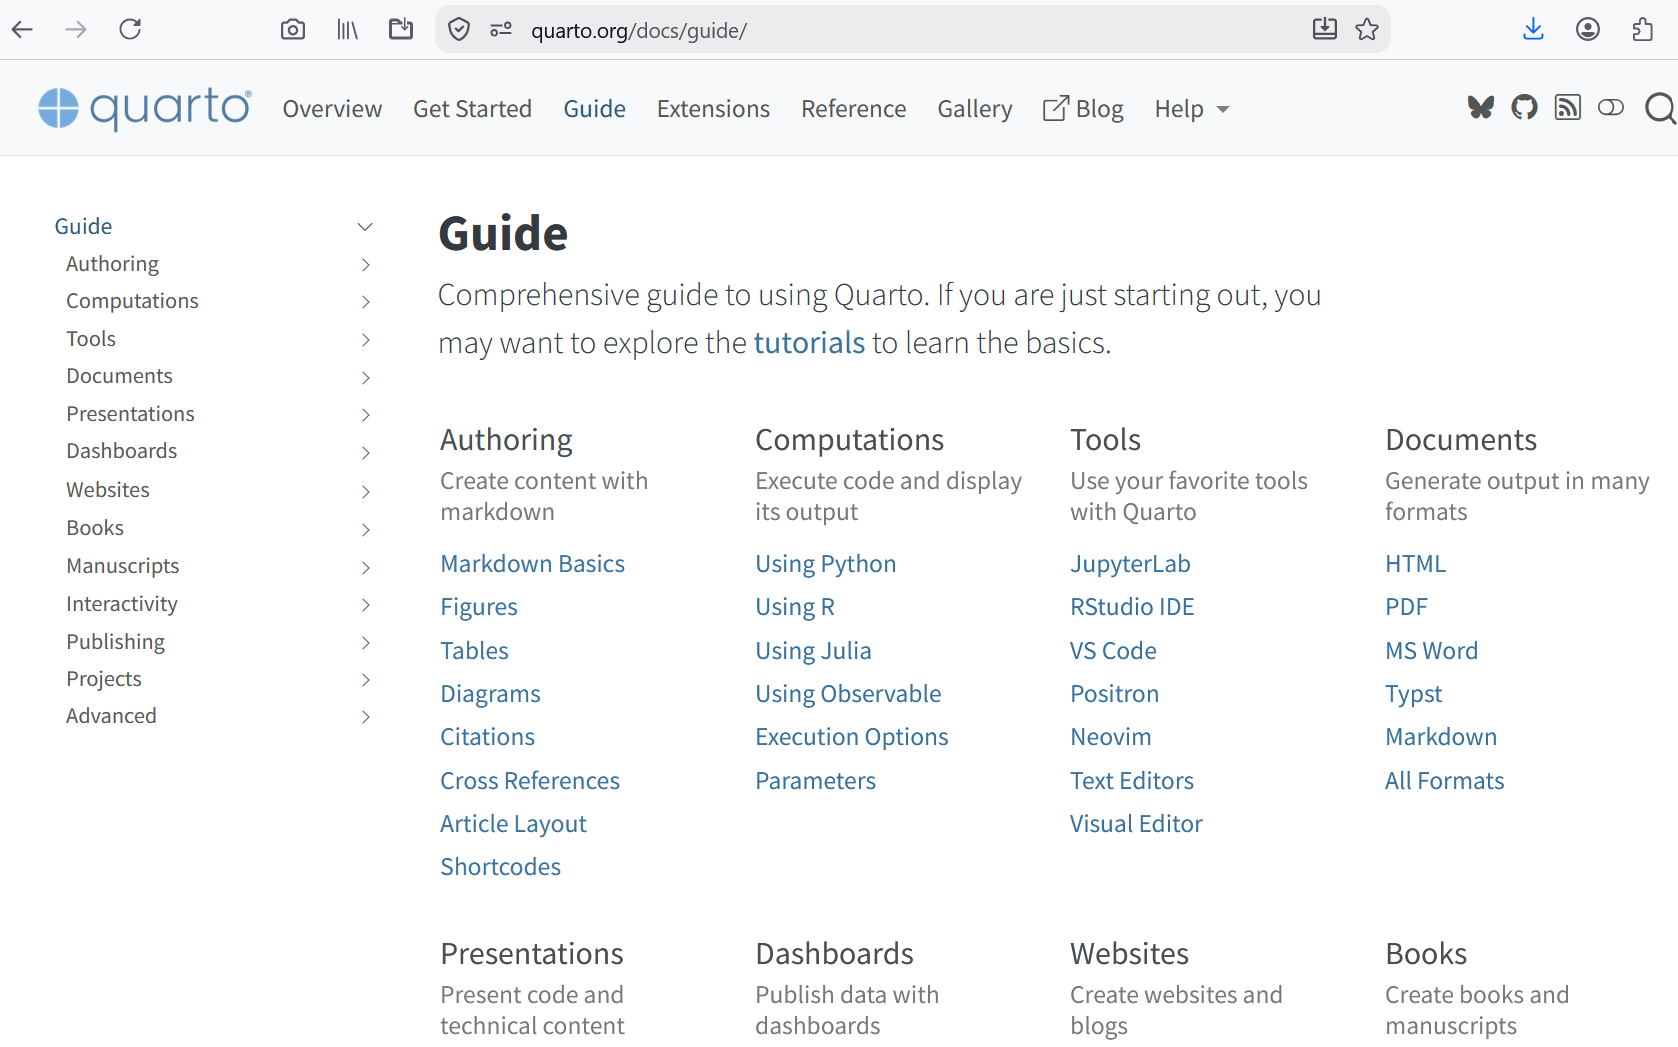
Output formats guide

Go to Quarto’s guide webpage:
Markdown

See documentation.
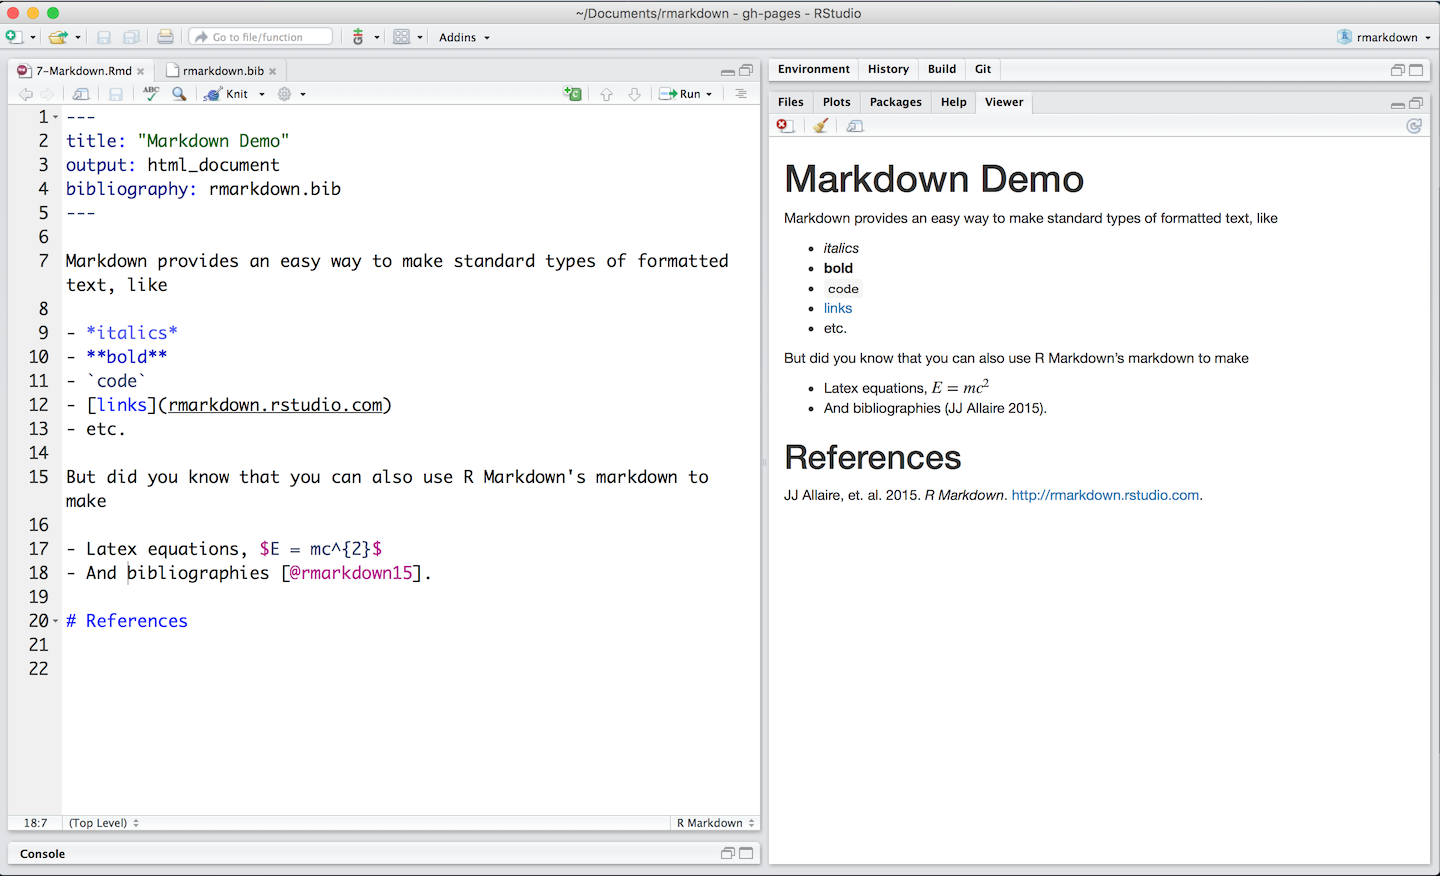
Example of Markdown and what is rendered

Quarto Markdown: div

“Div fencing” ::: wraps section in HTML divs. You can add custom or Quarto built-in classes to these divs:

::: {.border}
This content can be styled.
:::

Quarto Markdown: span

Use square brackets around selection to add HTML spans:

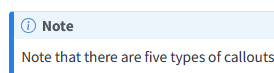
::: {.callout-note}
Note that there are five types of callouts, including:
`note`, `warning`, `important`, `tip`, and `caution`.
:::


![Centered image](picture.png){fig-align="center"}

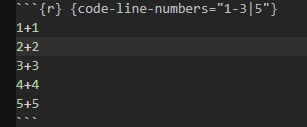
Quarto Markdown: span

Use square brackets around selection to add HTML spans:

Centered image

1+1
2+2
3+3
4+4
5+5

Quarto Markdown: reference

https://quarto.org/docs/authoring/markdown-basics.html#sec-divs-and-spans

Publishing to GitHub Pages

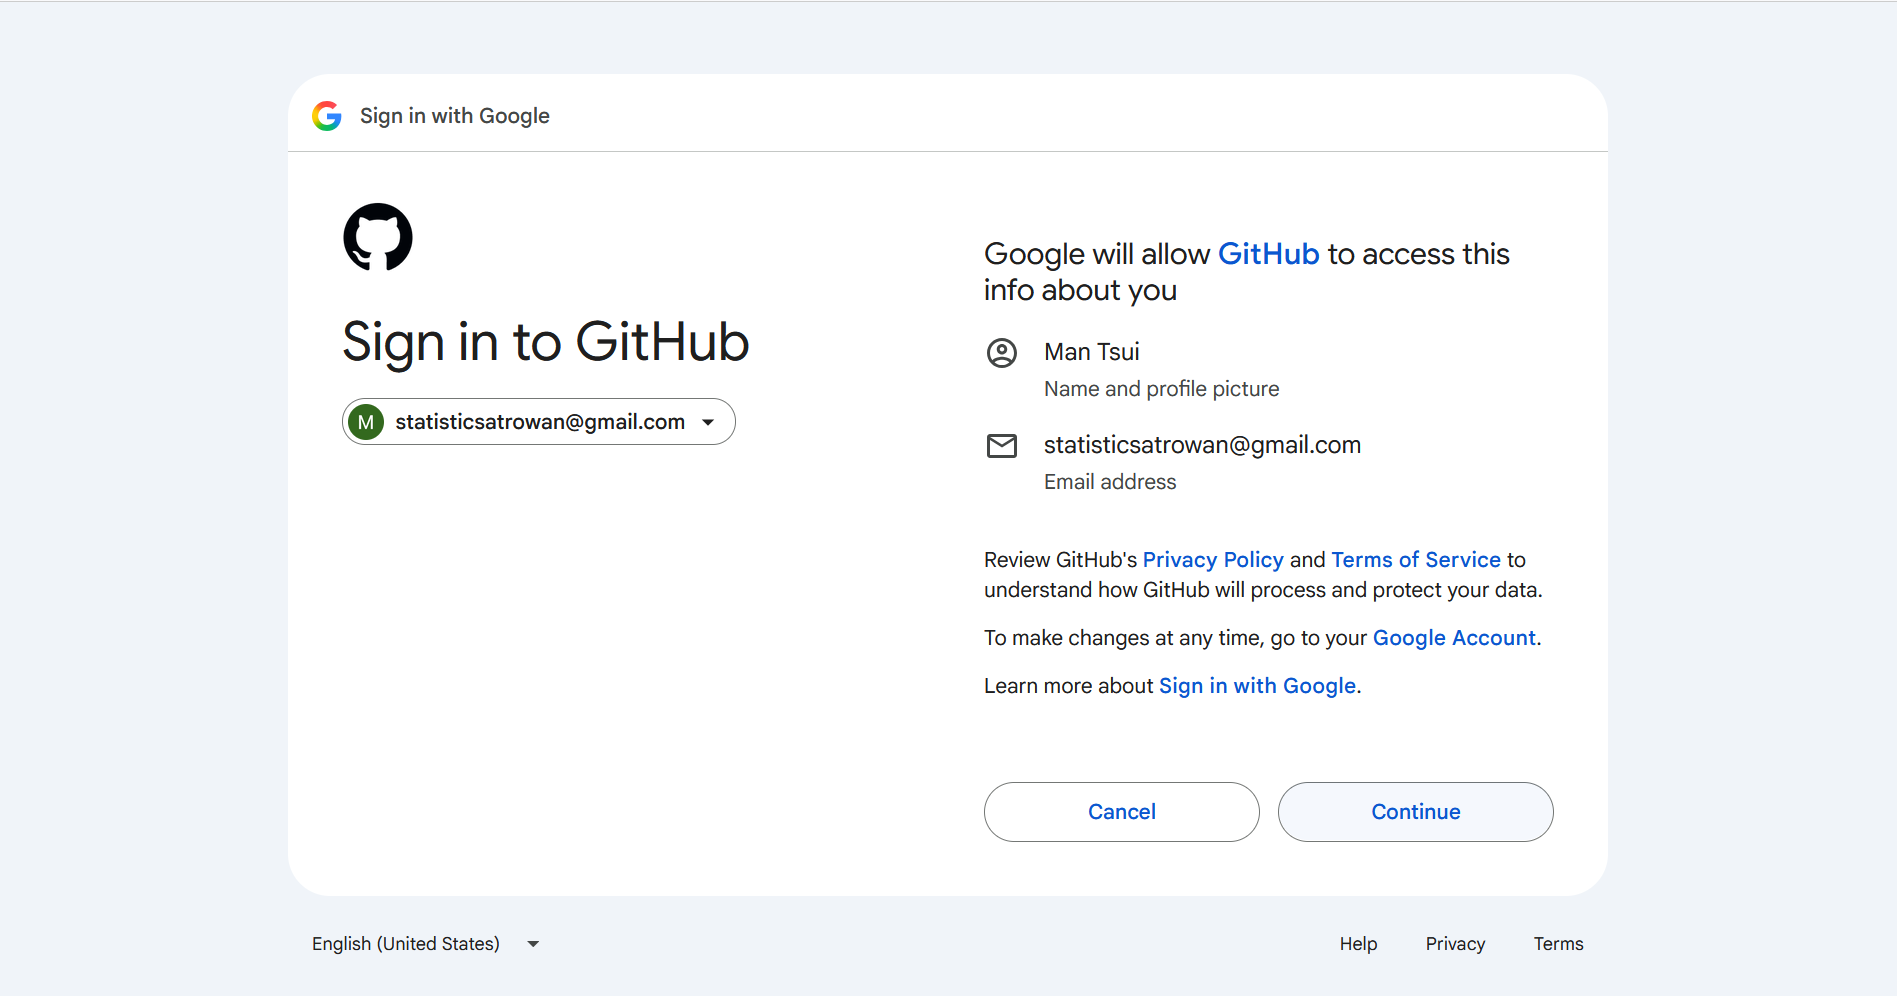
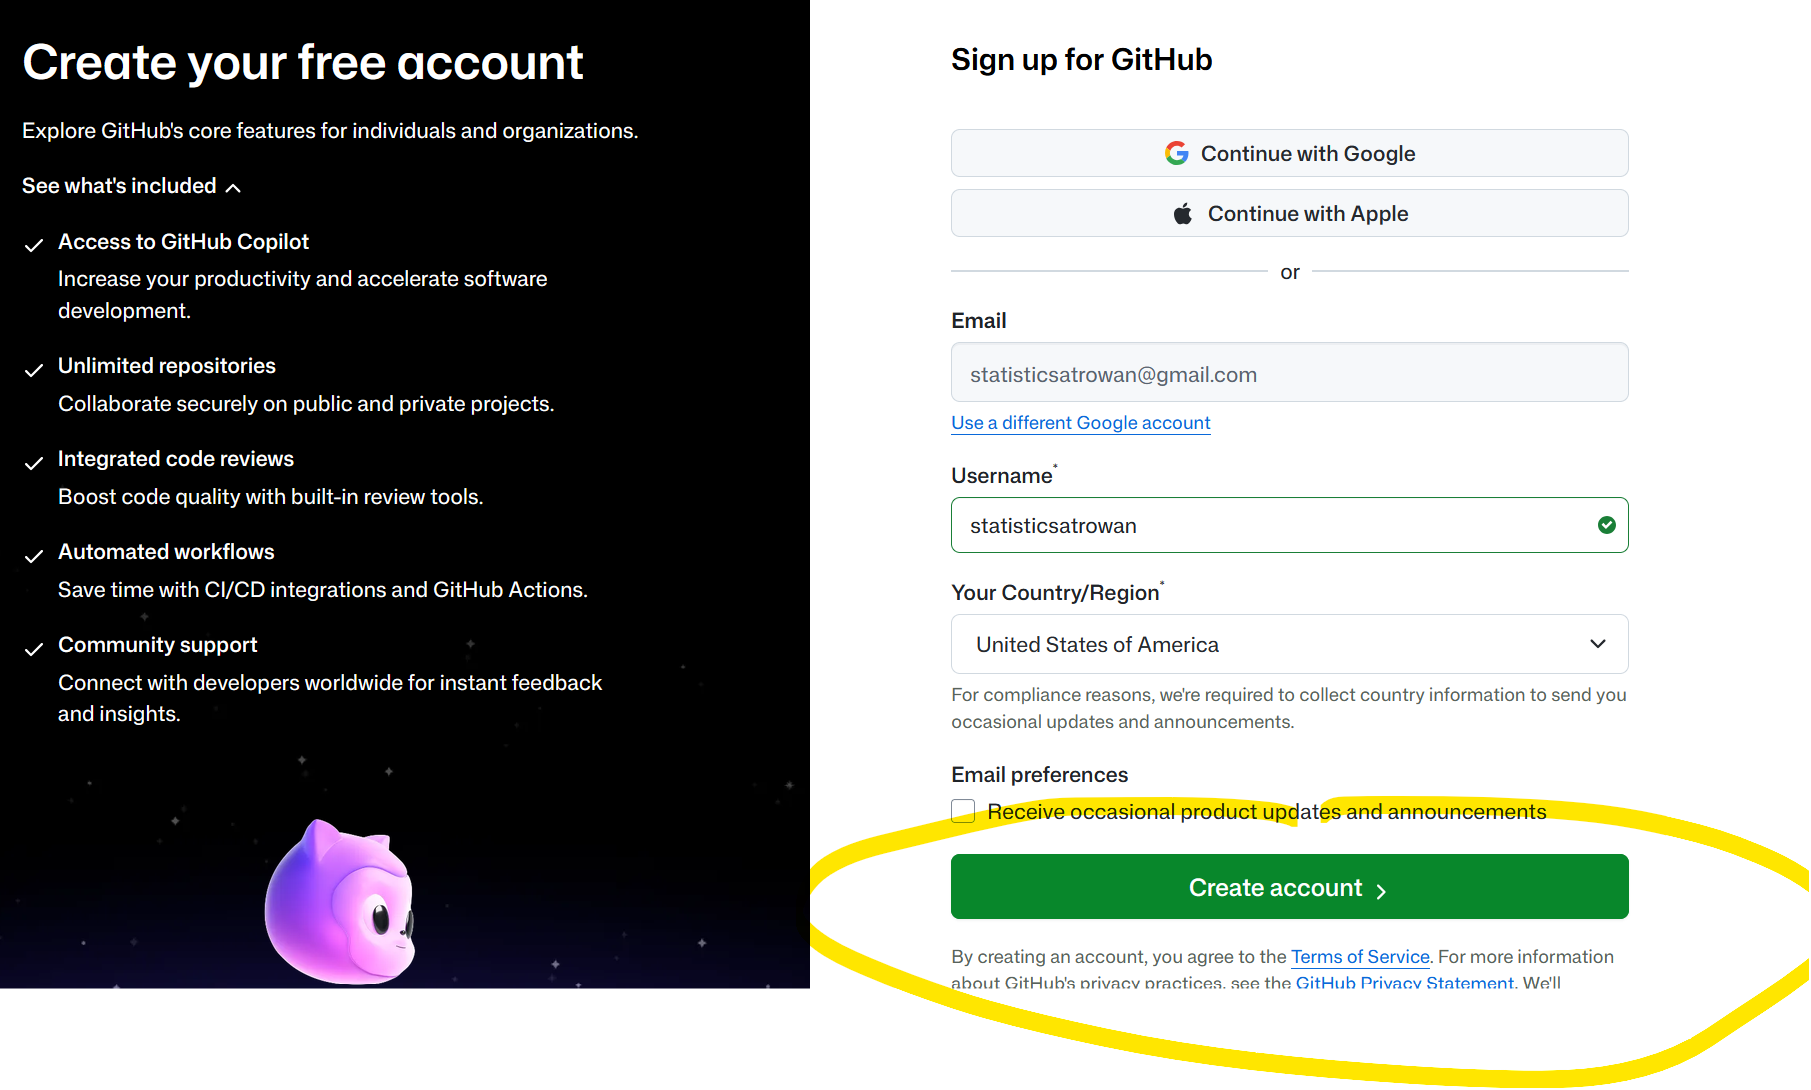
1. Create GitHub account

1. Create GitHub account

Choose a username appropriate to employers since your free website will be at yourusername.github.io:
2. Create GitHub repo
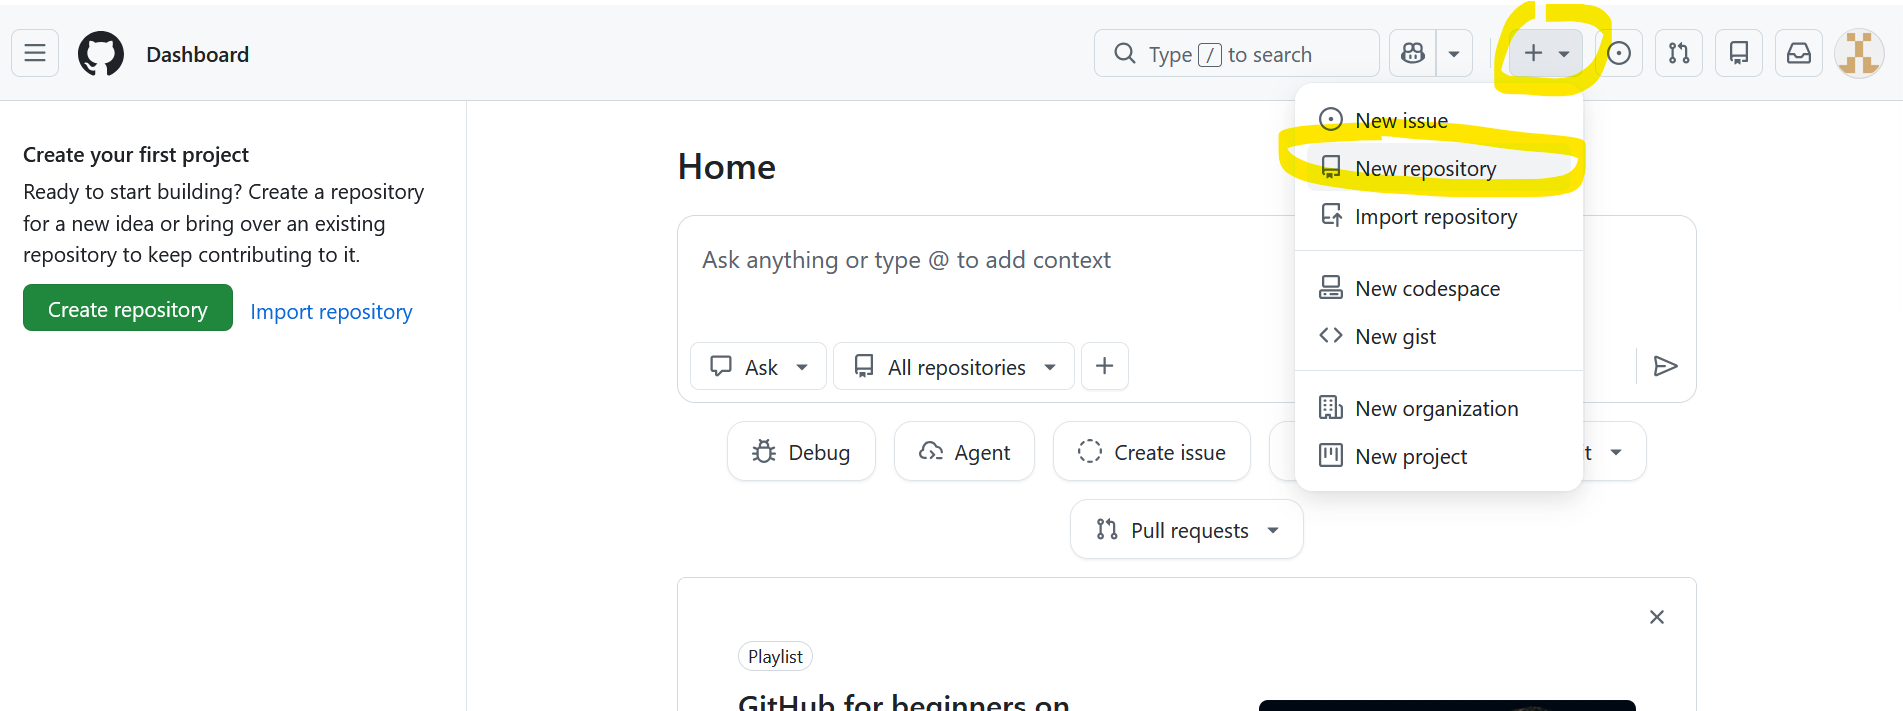
2. Create GitHub repo

The free website’s repo name must be yourusername.github.io
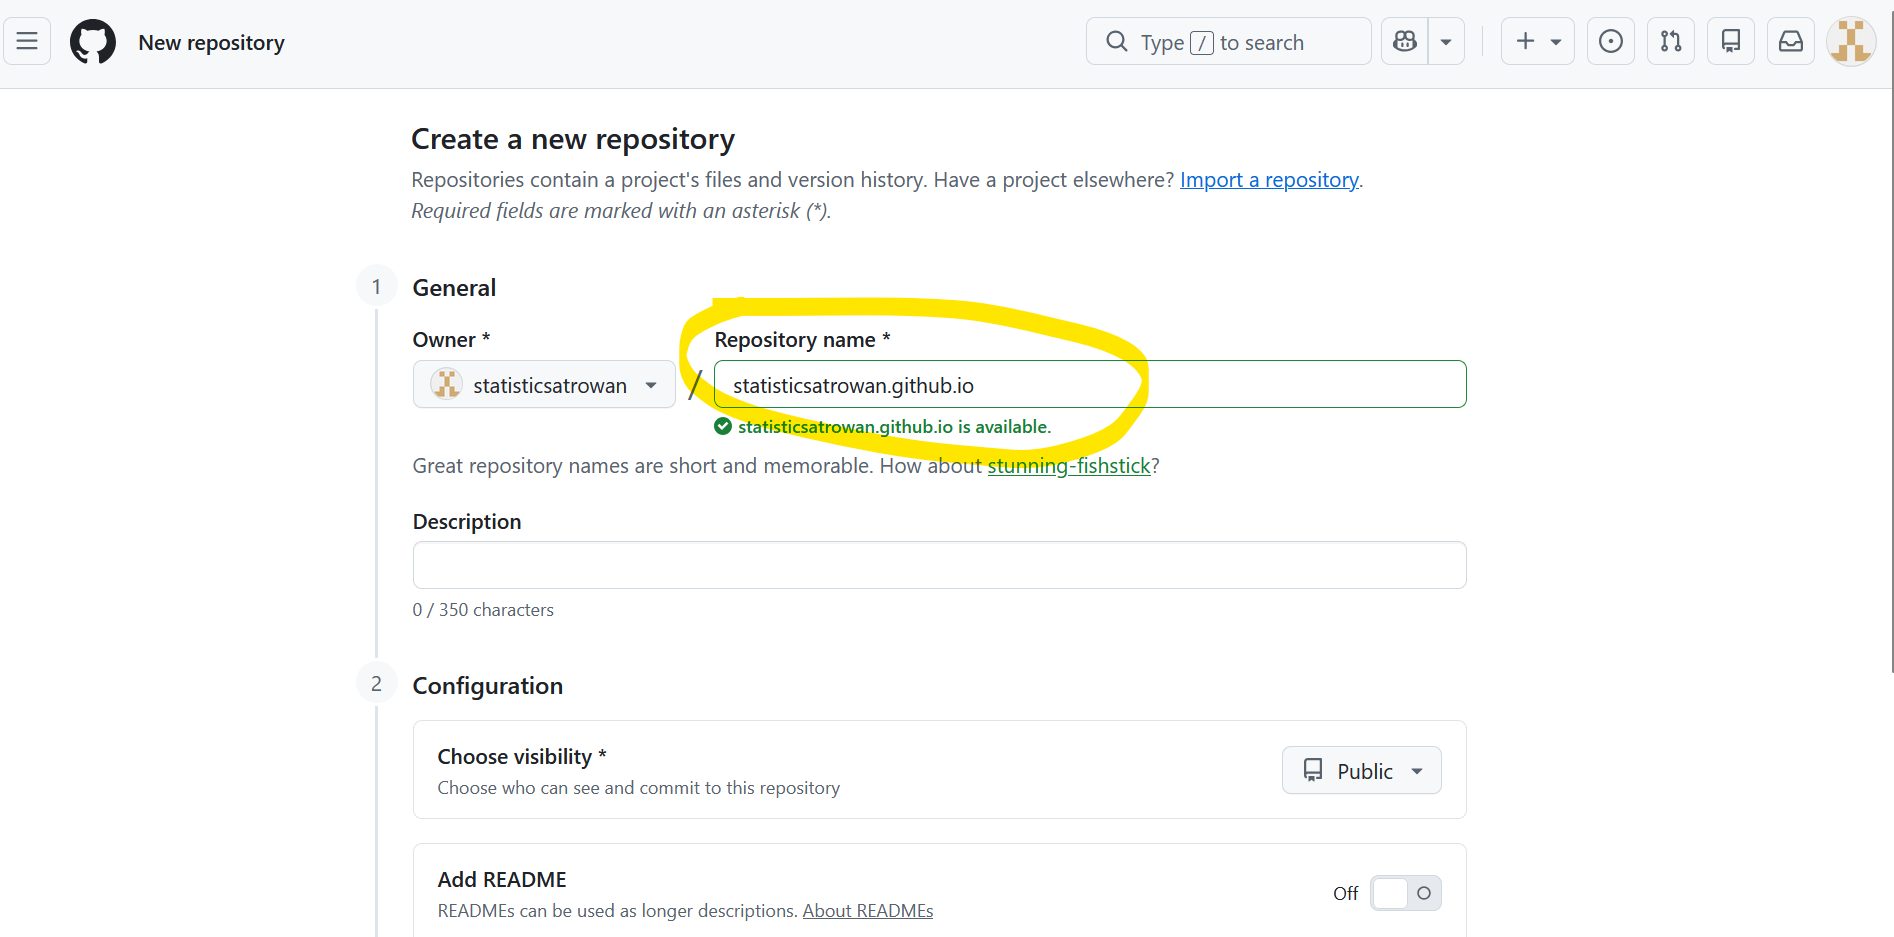
2. Create GitHub repo

Turn on “Add README” and hit “Create repository”:
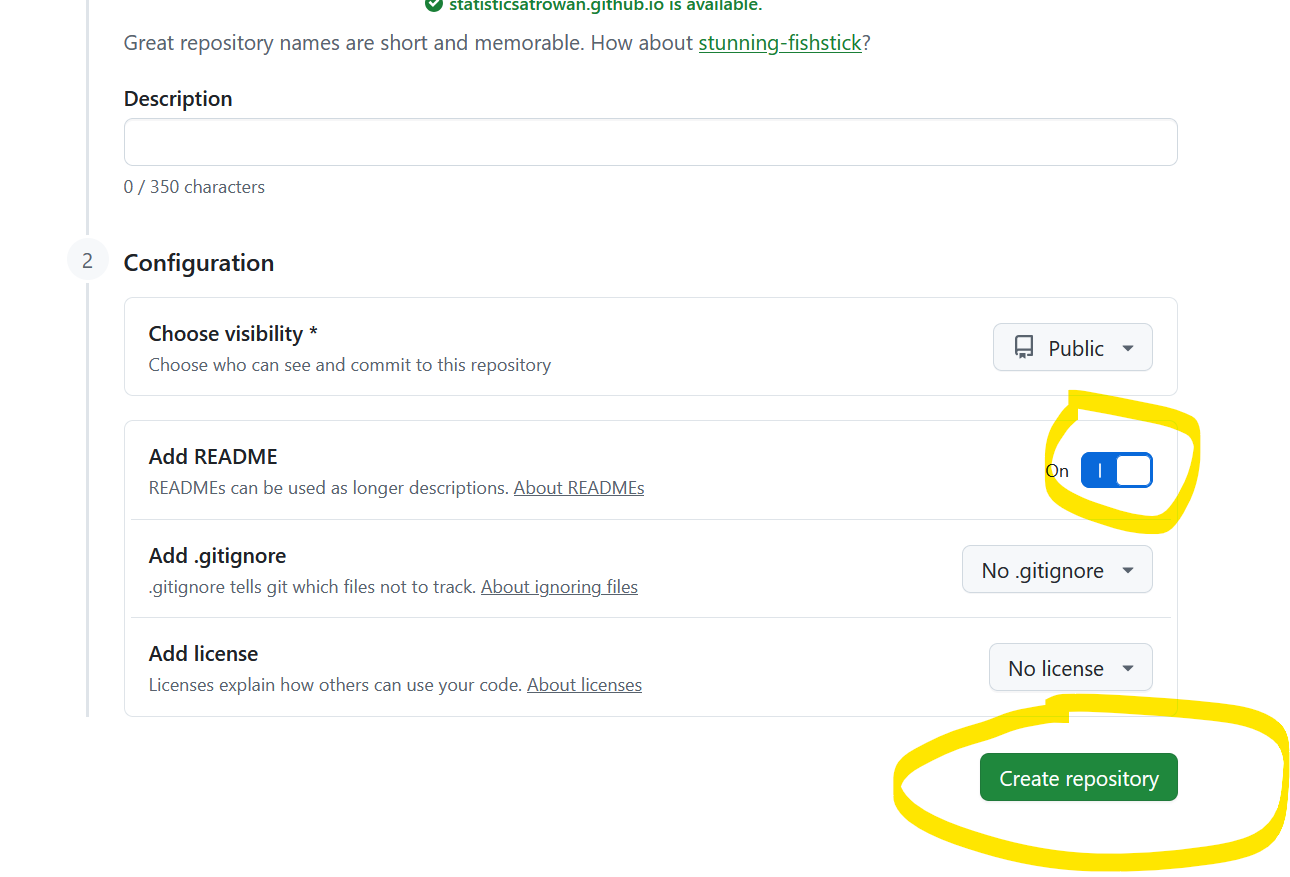
2. Create GitHub repo

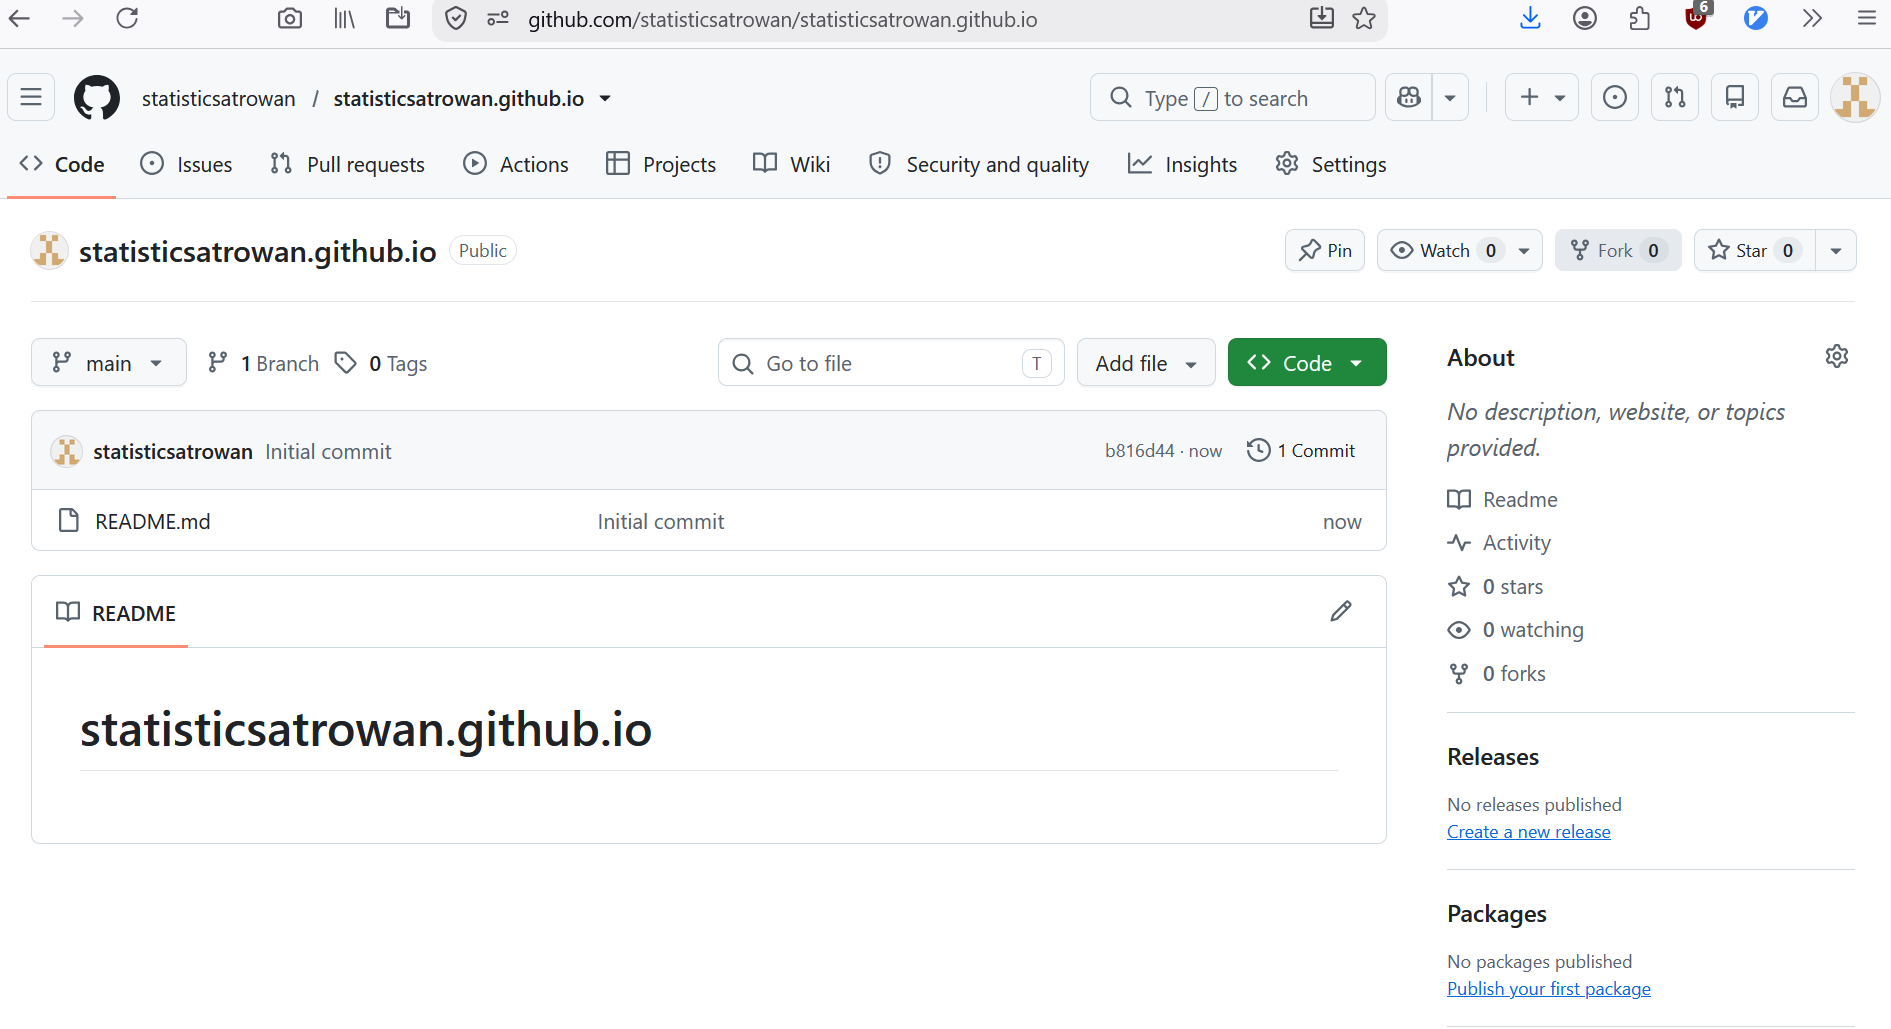
What you should see now:
3. See your free website
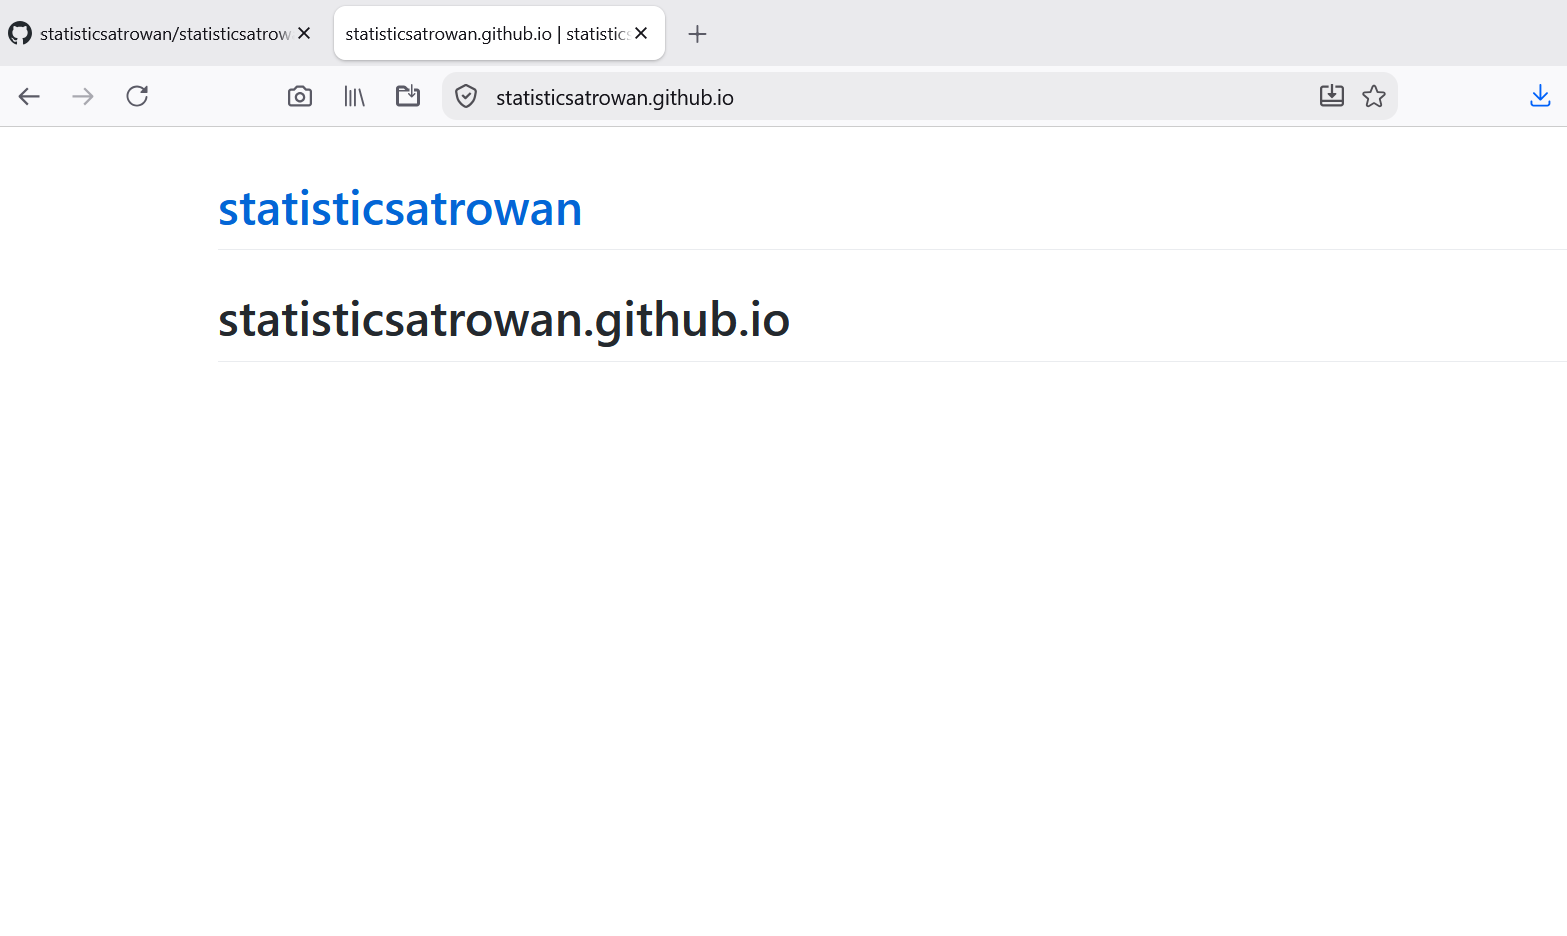
This is just the README.md which you can modify.

3. See your free website

Your website’s homepage would look even better if you upload a nice webpage named index.html.

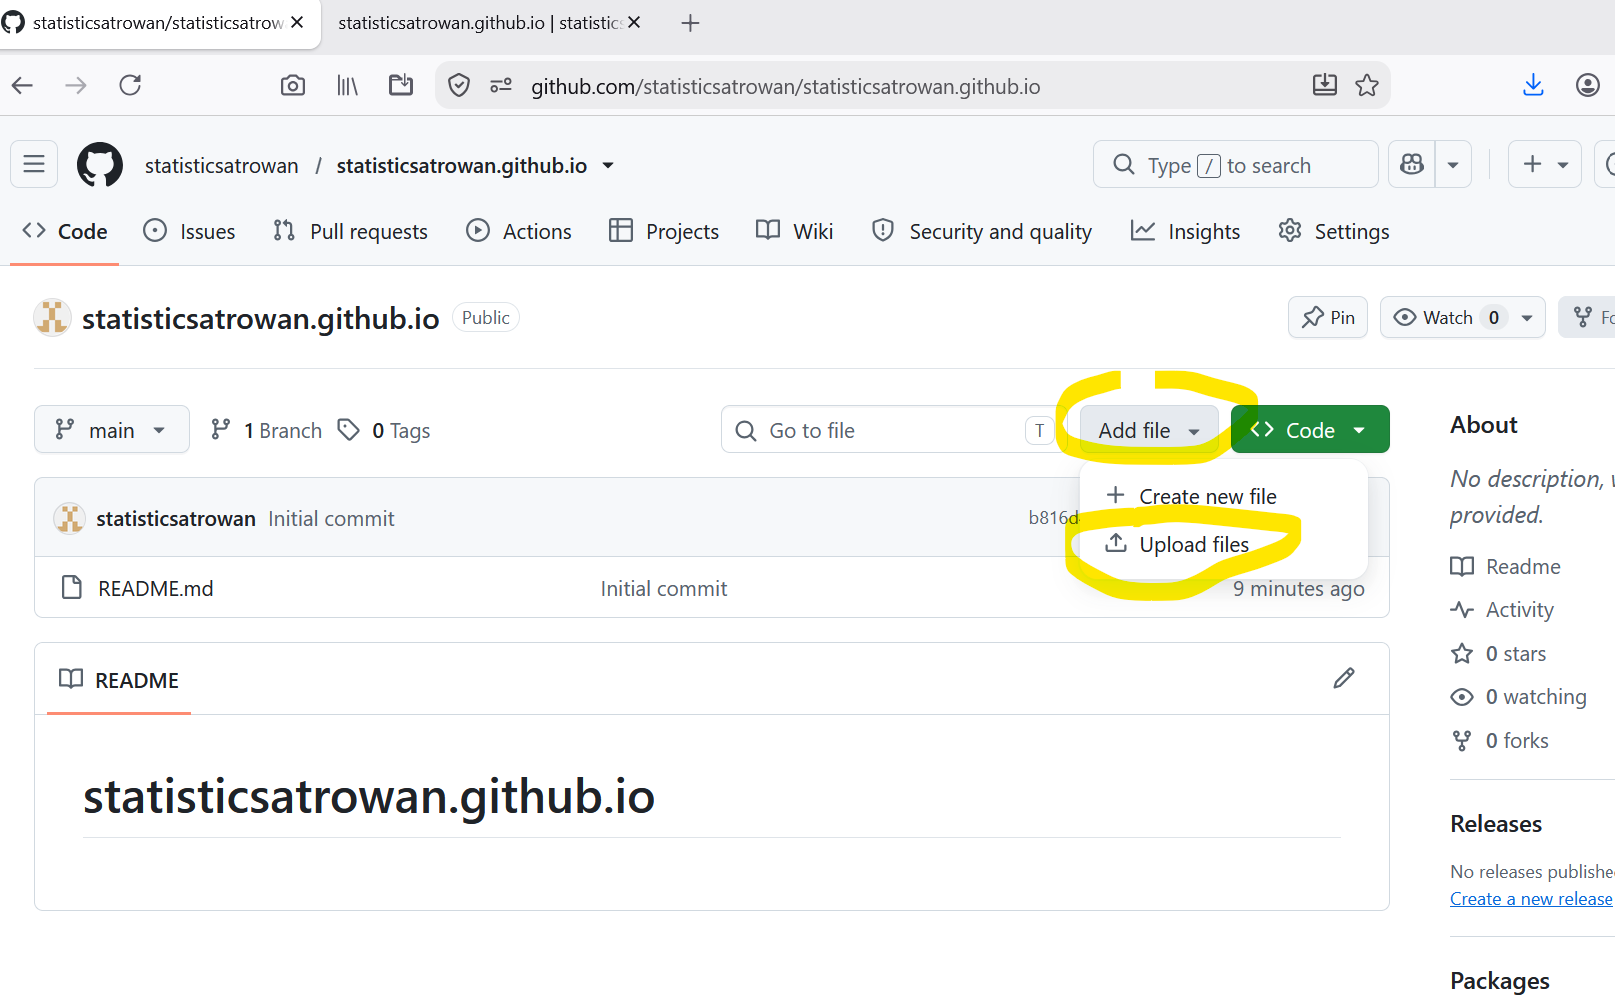
4. Upload your project
4. But wait: Quarto render the HTML

  • In your Quarto file YAML, include
format: 
    html:
        output-file: "index.html"
  • Why? index.html ensures a clean URL: a server pointed at a folder automatically reads the index.html of that folder. So your html file adopts your folder’s name.

  • Now render your .qmd in RStudio with “Render” button or in VSCode with quarto render yourfile.qmd in terminal.

4. Upload your project

Take your project folder including the _files folder which contains external dependencies (CSS, JS, etc.) to upload to GitHub:
5. See your Quarto webpage
What else?

  • On your free GitHub page: do not put secrets (confidential database, passwords, etc.)
  • Push to GitHub faster? Use GitHub Desktop. See YouTube tutorial.